
Post-Production Editing Tips
Oh, the possibilities … while post-production editing can be daunting, learning how to hone that skill can improve your overall photography and transform your style. Post editing allows us to see the hidden potential of a photo. Shooting away on the field, a photographer can get wrapped up in the task at hand and forget about all the other possible perspectives and moods the photograph could explore. By coming back into post-production, the photographer is able to look at an image with a fresh perspective.
In this way, post production can often change the entire mood of a photograph. We want you to reach your full potential as a photographer, so here are a few tips and tricks for post processing that could help. In this post, we’ll take a look at an example photo taken in Rome and we’ll show you the editing process along the way. For this image, we’re going to be using Adobe Lightroom, but most editing software is the same.
Here’s the original:

Use a Non-Destructive Editing Program
Whether you’re using Lightroom, Photoshop or another software, make sure that when you import your images to the program, you import them as a COPY of the original. With programs like Lightroom and PremierePro (for video) you can freely edit without the worry that you’re original photo is lost forever if you make a mistake.
Shoot in RAW
Shooting in RAW instead of JPEG allows you to edit things like exposure, highlight and color tone without messing up the quality of the image. It all comes down to how the image is captured that makes editing easier. We highly recommend shooting in RAW for every situation, this way when you copy your photos to Lightroom, you can edit and export them into JPEG files after you’ve finished editing to your desires.
EXPOSURE EXPOSURE EXPOSURE
Before you do anything else, ask yourself: is the exposure how I want it? A simple half-stop change can bring out glorious detail or add dramatically to the mood of a photo. Remember, if you’re in a non-destructive editing program, you have a bit more room to play around with exposure. There’s always the option of reverting the image back to it’s original. Don’t be afraid to adjust the exposure a few stops to compensate for any mistakes during your shoot. We don’t know about you, but for us, getting the right exposure in the field is hard enough, especially in light-shifting conditions. We’d rather have the option of fine tuning it later. In the end, all that matters is that you get the shot. As long as you’re in the ballpark of your desired exposure, post editing will save you the hassle. (For this photo I increased the exposure by a full stop and a half).

Highlights and Shadows
Don’t forget the power of adjusting highlights and shadows to add contrast. It’s a much less intrusive and natural way to add desired contrast to an image without using the dreaded “contrast” tool. Slightly up highlights to bring out the illuminated parts of the photograph, and darken shadows to create a drama. Use this technique especially for sunny photographs with lots of shadows. If done correctly, it can really help bring out the full potential of a classic “sunny 16” shot.
Lightening the Face
Dodging and burning is terrifying, but so is everything else in life, so don’t be afraid! Just slightly lightening the face of your subject can naturally and discretely draw the viewer’s attention to where you want it – the subject. Just don’t go overboard, just a slight 10-20 highlight or exposure adjustment should do the trick. Make sure to follow the natural contours of their face, and zoom in 1:1 so that you can widen the feathering of the brush to create a more natural look – too many harsh adjustments can make it look like the subject is wearing a mask. (For this shot, I selected the face and hands, then upped the highlights +20 for a very subtle effect).
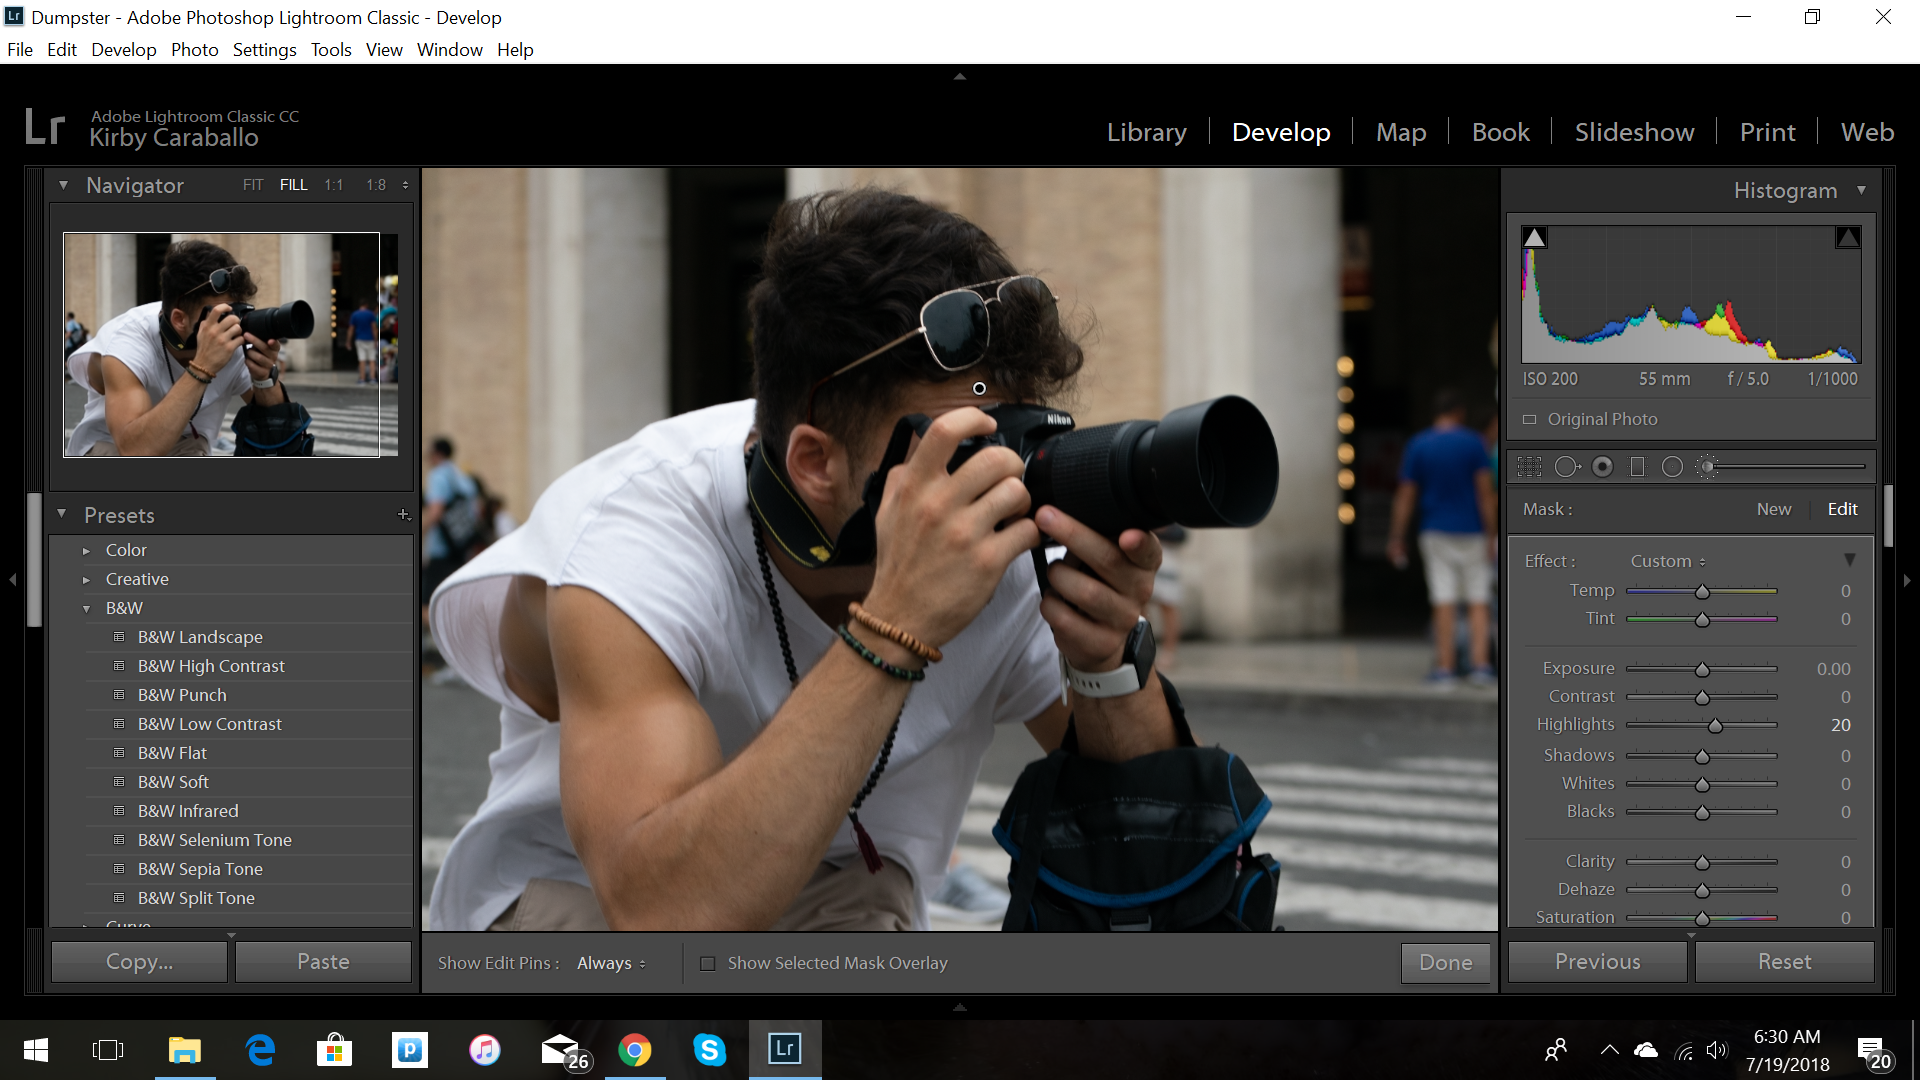
Color Correcting
This part is essential. Try using the software’s “auto” adjustments first, if it doesn’t produce the desired effect (as we often find), try playing around with the available presets. Most programs should offer presets to help adjust the white balance of images shot in tungsten, fluorescent, daylight, cloudy, and flash. Try using those presets and adjusting the scale as needed. A great thing to do to emphasize color in a photo is to adjust the “vibrance” rather than the “saturation.” This way, the photo’s naturally captured colors come out with a pop, but they don’t seem too manufactured. As with everything though, make sure not to go overboard. Staying in the range of a +/-10-35 adjustment should do the trick. (For this image, I wanted to add a bit of warmth to his skin, so I played around with presets to get a slight warming effect with the “Flash” option. I also upped the vibrance a stop).

Cropping
Cropping is your best weapon for making a photograph interesting. For many photographers like photojournalists and street life photographers, they rely on cropping to create a comprehensive photo. In spur-of-the-moment situations, we shoot quickly, often throwing out things like framing. The best part about cropping is that it gives you a second chance to frame. Try coming in tightly on the subject or tilting the image. While the rule of thirds remains a golden rule, try experimenting a little bit by throwing away the rules and cropping wonky proportions. While the image may or may not end up salvageable, the little bit of creativity can help develop your style further, allowing you to think about framing techniques beyond the simple rule-of-thirds. (Why not get crazy with it? For this shot, I wanted to show how a simple crop can bring out the focus of the photograph. Now we notice the people in the background more and follow the length of the subject’s camera).
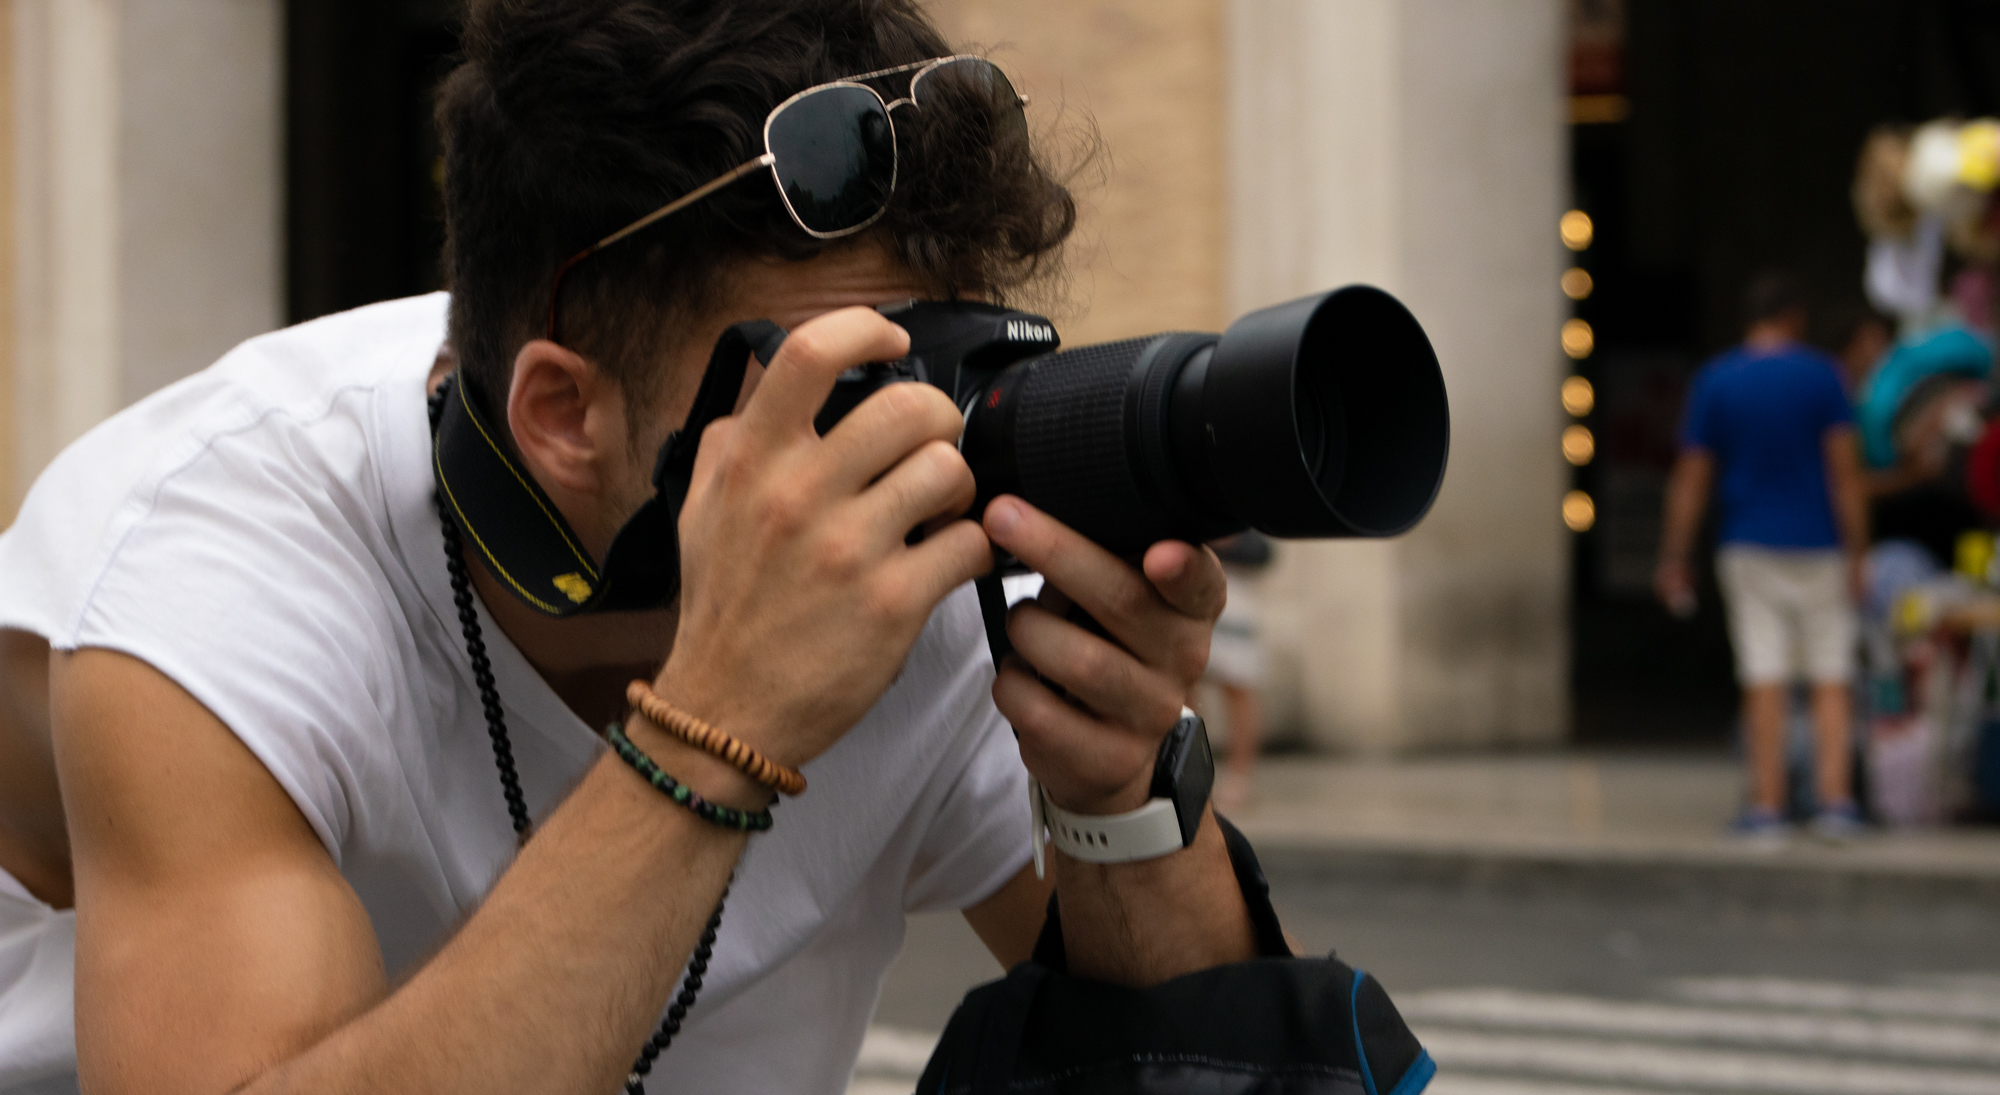
And there’s the final product! Now, go forth and happy editing from Rome Photography Workshop.
-Kirby Caraballo